Category Archives: Uncategorized

Surging in the Dark

Who remembers the Dwarrowdelf cycle? Khazad Dum, with its swarming armies of Goblinses, leaving you constantly on the back foot, as you tried desperately to fend them off. Surely lots of surge here, right?

Deep-Deep-DarkWell apparently not. Hazy recollections aside, once you actually get down to the numbers, standard difficulty Dwarrowdelf quests don’t really look any surgier than the Mirkwood cycle. The highest probability of surge caps out at around 1 in 9, which is the same as the Hunt for Gollum, but without the forced effect from the quest card revealing extra encounter cards, there are 4 quests (out of 9) with no printed surge whatsoever, and others like the Long Dark have only a token nod to surge with one card in a deck of 60 bearing the word.

The most notable outlier comes in Foundations of Stone, where the players deal with two entirely different encounter decks at different points, and the deck for stages 4 & 5 does have an impressive 1 in 5.5 chance of surging, although if you’ve quested carefully, you should be fairly well set-up by that point.

Easy mode in Dwarrowdelf behaves as you’d expect. Aside from the second foundations deck, surge either gets even less likely to appear (missing altogether from 5 of the 9 quests now) or remains statistically insignificant. Nightmare cranks it up somewhat, with a high of 1 in 5, and only one deck escaping altogether.

Where Dwarrowdelf really punishes players though, is in the surge-like effects. In standard mode, every single quest has at least a 1 in 10 chance of revealing a surge-type effect, with the odds in a couple of decks being 1 in 3. This doesn’t really change all that much across Easy or Nightmare mode.

Goblin-SpearmanGoblin-Swordsman

Lastly, it’s worth noting another slightly distorting feature of the Dwarrowdelf cycle, the Goblin enemies who come out as a shadow card, then add themselves to the staging area. I think this is probably the main reason why it feels so surge-y even if the numbers don’t really suggest it- in several quests, there are no fewer than ten cards with the potential to transform at a moment’s notice from a shadow into an enemy. The figures below are worked out without factoring in these shadow effects.


Average surge likelihood:

Highest:               1 in 9 (11%)          Into the Pit

Lowest:                zero                      Flight from Moria, The Redhorn Gate, Watcher in the Water

Cycle overall:       4.5% standard,     4.3% Easy,            9.7% Nightmare

Surge-type effect Likelihood:

Highest:               1 in 3 (33%)          Into the Pit, Foundations of Stone (part I)

Lowest:                1 in 10 (10%)        The Redhorn Gate

Cycle Overall:      23% standard,      19% Easy,             25% Nightmare

Overall verdict – Not surge, but something a lot like it.

Surges Through Mirkwood

FloodingBack in the days of the core set, and the Mirkwood cycle, surge was a rare beast, occasionally sighted fleetingly through the woods. In Passage Through Mirkwood it was lacking altogether, and there were only a few examples in other core-set cards: The Eastern Crows were the most prevalent of Core-set surgers, but these could be neutralised by questing with Thalin (remember him?) killing them before they could activate – otherwise, the intensity of surge got worse and worse, as the crows were shuffled back into the deck each time they died.

IsolationIt’s probably no surprise to learn that by-and-large, the transition to Nightmare mode generally makes surge more prevalent: Nightmare Return to Mirkwood is the stand-out in this respect, with straightforward surge effects accounting for more than 1 card in ten, and surge-like effects appearing on a slightly terrifying 1 in 3 cards

More surprising is the discovery that in many instances, Easy mode actually made surge more likely, simply because many of the surging cards survived the cut, but found themselves in thinner encounter decks for a greater probability of appearing any time a random card was revealed. Clearly this says something (at least from the designers perspective) about the impact of surge on difficulty – a moderate card with the possibility of another is viewed as less of a challenge to the players than something inherently hideous.

Overall, the Mirkwood cycle is hardly overwhelmed by surge. In 4-player, Massing at Night is going to mess with you, and Return to Mirkwood is punishing, but at the other extreme, Journey to Rhosgobel is missing surge altogether, with Conflict at the Carrock not far behind. Journey Along the Anduin and Hunt for Gollum both have quest-card effects which reveal an extra encounter card, although Hunt does at least allow you to pick between 2 or 3.

The spread of surge-like effects is always broader than surge itself, and includes travel restrictions on locations (Mountains of Mirkwood) and Treacheries with mis-fire protection. However, both of these feel like they are on a limited scale, compared with what comes later

Average surge likelihood:

Highest:                1 in 9 (11%)            Hunt For Gollum

Lowest:                 zero                        Passage Through Mirkwood, Journey to Rhosgobel

Cycle overall:        5.6% standard,       4% Easy,               9.6% Nightmare

Surge-type effect Likelihood:

Highest:                 1 in 4 (25%)          Hills of Emyn Muil

Lowest:                  1 in 24 (4%)          Conflict at the Carrock

Cycle Overall:        12.7% standard,    10.8% Easy,         18.7% Nightmare

Overall verdict – not so surging.

Next up, Dwarrowdelf, get ready for some swarming goblinses…

Surge – Part 1

Sooner or later in this game, it seems that everyone has to confront the question of surge. Most blogs, podcasts, or even normal forums users have run into the question at some point.

Eastern-CrowsThere is certainly a feel that the number of cards which surge has increased since the beginning of the game, but I wanted to have a bit more of a look at the detailed numbers involved.

By this point in the game’s life, we certainly have plenty of data to work from: there have been 4 complete cycles of quests, 5 Saga boxes, assorted stand-alone quests, and the first 4 quests of a new cycle. Throw in Nightmare and Easy mode, and that’s a lot of quests. To be a bit more precise, 60 unique quests with just over 150 variations.

Normal Easy Nightmare
Mirkwood 9 9 9 27
Dwarrowdelf 9 9 9 27
Shadow 9 9 9 27
Ringmaker 9 9 18
Hobbit 6 6 6 18
LotR Saga 11 11 3 25
Angmar 4 4 8
Gen-Con 3 3
60 56 36 152
  • NB, I don’t currently own the Nightmare packs for Heirs of Numenor or Black Riders, so won’t be factoring these in.
  • “Gen Con” is the heading I’m using for The Massing at Osgiliath, The Battle for Laketown, and Stone of Erech. – The Old Forest, and Fog on the Barrow Downs I’ve put with the Saga quests, although Fog on the Barrow-Downs remains unavailable in Europe, so will also be ignored for stats purposes.

At root, whilst there are a number of things in the game which probably can’t be quantified easily – nastiness of enemies or locations, particular mechanics etc, there is one thing we can see which should provide a good overall guide, which is the simple question of “how many cards will I be revealing off of the encounter deck each round?”

Surge-y
Massing-at-NightAside from the traditional “surge” effect, there are various other cards which have effects similar to surge. Some of these are conditional on player-numbers, making their impact harder to measure statistically.

The classic example of this is “Massing at Night” a treachery card from the Core Set, which reveals an additional encounter card per player.

In solo-play, this card could easily be removed from the game, as it will never do anything beyond disappearing and drawing a replacement. In 2-player, the functional effect is the same as giving the next card “surge” and by the time you reach 4-player, it snowballs to terrifying proportions.

No Escape
Early on in the game’s life, there were a pleasing number of treacheries which, although potentially nasty, could also whiff completely at times. Quest with everyone the use Grim Resolve to ready, then the Necromancer’s Reach will do nothing. Have low threat, and Evil Storm will miss entirely too. Evil-Storm

Nowadays, it’s very rare that the designers will let you off so lightly. Most treachery cards these days have some effect along the lines of “All X’s do Y. If there are no Xs / no Ys happen, this card gains surge.”

Obviously, this card increases the difficulty of the game. Previously, there was a chance for a let-off. Now there is not.

The question is, whether this type of effect is best considered under the “surge” heading? Yes, the card has “gained surge” but as it is otherwise a blank card, the total number of cards causing issues for the players will be no greater than originally expected. One of the issues of a “living” card game, is trying to determine what is “normal” (i.e is it now, or is it how things were before?)

Extra Punishment
It’s also worth considering effects which give other cards surge – Bolg in Battle of Five Armies gives surge to the first Orc enemy revealed every round, the Quest Card in the Weather Hills gives surge to the first weather treachery each round.

A subtly different effect is the effect which reveals an extra card each round. However heavy an encounter deck may be with orcs, we’ve never yet seen one which would guarantee an orc appearing. You can strongly suspect that Bolg’s “surge” effect will trigger, but you can’t guarantee it. When (for example) you are in stage 2 of Journey Along the Anduin, you know that there’s an extra card coming out.

Only Bad Options
Orc-Hunter A pleasing development in the card-game over more recent cycles, is the increased amount of choice players are given. Rather than simply “this bad thing happens” there is now often a choice between “do this bad thing, or suffer this other bad effect.” – It’s still bad (which is the point of the encounter deck), but at least players have the opportunity to make decisions, feel like their actions matter, and they aren’t simply being swept along by the game. Of course the difficulty of this, is that it’s no longer clear whether the card surges or not, particular in the “Do X or reveal an additional encounter card” structure.

Is More Always Bad?
It’s also worth considering whether there are ever times when having more cards revealed from the deck is actually a good thing? Obviously, if this is ever the case, it’s going to be very marginal, but I thought I should at least cover the possibility.

The one example which jumps to mind, is Wingfoot. Especially with low player-counts, or without scrying, there’s a definite chance that this will simply miss, and your hero won’t ready. Is it worth having an extra card come out just to get that extra action?

I think it’s at least possible that it could be – if you have the characters to deal with the enemy, then seeing an enemy and a location could be better than just the location. Beravor is a fairly good target for Wingfoot, given her rounded stat-pool, and ever if you don’t need her for combat, the action advantage gets you two cards. If you have Legolas in play, you can place progress for killing the enemy (although the enemy would have to have only 1 threat for this to be a net gain), and the extra body might enable you to trigger Foe-Hammer when you kill it, or Valiant Sacrifice, Horn of Gondor, or any number of “character leaves play” effects. If your board position is good enough, you might even be able to let a high-threat enemy hang around for a round, to quest with Halbarad then lower your threat with Secret Vigil.

He's twitching because he's got my axe embedded in his nervous system...

He’s twitching because he’s got my axe embedded in his nervous system…

Whilst the list of options above isn’t small, it’s still only going to be a very small minority of situations where you’ll want that extra card appearing- and only then if it’s the right type. You can always hit an enemy harder than you need to (I’ve lost count of the number of times Legolas has stuck an extra arrow into an already dead orc just for some progress tokens) and as already mentioned, it generally needs to be a very specific type of extra card. Overall, almost without exception, I feel like “one more card” of unspecified type is going to be a bad thing.

Probability
Ultimately, there will never be a set in which every card surges. However, there will be sets which are much more likely to swarm you than others. What I’m looking to do then, is to produce a kind of statistical average, quest-by-quest of how many cards are likely to be thrown at you.

To simplify things, I’ve decided to break it down as follows:

No surge – A standard card which appears, and that’s it.
Surge – A card which appears, does something AND adds a card. I’ll also use this for forced effects which reveal an extra card (or more) each round.
Conditional Surge – This will cover all of the other effects, cards which surge when certain conditions are met, cards which offer you a choice between an extra card or another penalty (discard an ally, remove a time-counter, take some damage etc)

For each quest, I’ll try to provide a ratio between the 3 card types, and a few other helpful numbers indicated the likelihood of cards swarming or the total number of cards you can expect to see.

By now, you may have come to the same realisation I have, that this is a fairly sizeable undertaking. You may also be questioning the wisdom of taking on this kind of project with so many gaping holes remaining in the difficulty project, but I think that this will actually feed into that in a fairly helpful way, giving some kind of factual information to go with the gut-feeling approach that I’ve been using as the overriding principle. (at least in theory, I should have a bit more time over the next few weeks to get some of this stuff done [famous last words, I know]).

So, having set this up, I’m going to post a series of mini-articles (hopefully more frequent than standard articles) for the various cycles, and a final one to draw them all together.

The Wizard’s Voice

“Suddenly another voice spoke, low and melodious, its very sound an enchantment. Those who listened unwearily to that voice could seldom report the words that they had heard; and if they did, they wondered, for little power remained in them. Mostly they remembered only that it was a delight to hear the voice speaking, all that it said seemed wise and reasonable, and desire awoke in them by swift agreement to seem wise themselves. When others spoke, they seemed harsh and uncouth by contrast; and if they gainsaid the voice, anger was kindled in the hearts of those under the spell.” – The Two Towers

This week, the world received the news that Christopher Lee, better known to Tolkien fans as Saruman the White had taken the last ship into the west. At 93, his death can hardly be considered a surprise, but here at Dor Cuarthol, we wanted to pay tribute to the man who brought this character to life.

GOODBYE

GOODBYE

Christopher Lee led a long and full life: he fought in the Second World War, and to many of elder generations, he will be remembered as Dracula, for his work in the Wicker Man, or even as a Bond Villain.

For me though, Christopher Lee remains inseparable from two parts, both taken on very late in his career: Saruman the White of Middle Earth, and Death of discworld. Both are parts defined in large part by their voices: Lee may not actually have been able to speak in capitals as the disc’s reaper did, but it isn’t hard to see how the casting team picked him for the role. [As a strange aside, anyone not familiar with Lee’s work on the symphonic metal concept album “Charlemagne: By the Sword and the Cross” should check out the videos on youtube – https://www.youtube.com/watch?v=cvKRbi2ovDY ]

Saruman

Saruman the White was the chief (although not ultimately the Wisest or Greatest) of the Five Istari sent to Middle Earth early in the Third Age. The others were Gandalf the Grey, Radagast the Brown, and the two Blue Wizards who long ago disappeared into the East, and whose names Gandalf tells Bilbo (in the Hobbit films) he has entirely forgotten – fortunately for you, we can confirm today that the individuals you’re looking for are Allatar and Palando.

The unfinished tales tell us that the Istari, although clothed in the likeness of aged, mortal men, were in fact Maiar – that is to say, the same type of creature as Sauron himself, or the Balrogs. Gandalf’s “true” name is Olorin, and Saruman’s is Curumo.

Whilst the Blue wizards are unlikely to trouble designers of the Lord of the Rings Card Game, the other three have already appeared, and I’m going to think today, a little about the Saruman cards we’ve seen so far.

Saruman officialSaruman first appeared as an ally. For those familiar with his later treachery, this may seem odd, but the card game is (primarily) set before the Ring sets out from the Shire, when Saruman is still head of the white council – indeed our illustrious heroes spent an entire cycle helping him unite the Dunlendings, forge his own Ring of Power and create the Uruk-Hai.

Even for those who didn’t spot ahead of time what Saruman was upto, this card fits well into a distinct playtype, that of the Doomed deck. Doomed cards allow you to trigger effects much more cheaply (in terms of resources) than would otherwise be the case, but with the added cost of a threat raise.

Saruman himself embodies this doomed mechanic well: for a mere three resources, he is a neutral ally (so affordable turn 1 by most) with 3 willpower, a whopping 5 attack, four defence and four hit-points. The sum of his stats are comparable with ally Gandalf, although he is a better attacker, but a worse quester. The catch for the 2-resource discount is the “doomed 3” text, which raises everyone’s threat when he enters play.

His ability is also strikingly different: whereas Gandalf lowers your threat or draws you cards, Saruman takes the fight to the encounter deck, and can treat a non-unique enemy or location as out-of-play for the round: at first sight, this can seem like a very marginal effect, but there are moments when it can prove highly useful, such as when you need a round’s respite before being bashed again by a Hill-Troll, or you desperately need to send your Northern Trackers to work on the staging area, but can’t cope with the Twisting Passage sat there. (I still have nightmares about The Long Dark.
The-Wizards's-VoicePersonally, I can’t say I’ve got all that much use out of the Doomed player-cards so far: I did build a solo deck with Saruman’s lackey Grima, Lore Aragorn and Theodred, which was fun, but in multi-player people seem strangely reluctant to have their threat raised by ten on round one…

Power of Orthanc does see fairly regular inclusion, but other cards like The Wizard’s Voice never quite seem to make the cut. Hopefully, the rise of the new Valour mechanic, and related cards which reward you for a threat over 40 will see this become a more viable deck archetype.

Another reason for Ally-Saruman not being flavour of the month, is that we’re still not that long past the Treason of Saruman box in which [spoilers] Saruman appears as an enemy.

Why are the enemies always stronger?

Why are the enemies always stronger?

Because the game just doesn’t like you very much, enemy Saruman has an extra point of attack, an extra hit-point, and has 1 more threat than his ally counterpart’s willpower. He’s also immune to player card effects, indestructible, and cannot leave the staging area, but you can probably lock him in his house, and leave him under the watchful guard of a treeherder.

Christopher Lee was already nearly 70 when he played Saruman for the first time, and even in the Fellowship of the Ring, he appears more for his command presence and might vocal intonations than his dynamic on-screen activity, but that didn’t stop him from playing a major part in the feel of a very fine Trilogy of Films. Whilst it would have been nice to see more of him, perhaps in the Scouring of the Shire, the last thing Return of the King needed was another ending.

As a parting tribute to the great man, I leave you with a couple of cards: one simply an alternate art for the Saruman ally card, and another an event, inspired by the scene in Lee’s final foray into Middle Earth

Saruman-Front-Face Leave-Sauron-to-Me-Front-Face

Christopher Lee: 1922-2015

Riddles in the Dark

Wong sort of Riddle?

Wrong sort of Riddle?

Recently, I’ve been dealing with what I believe is the king of the “must custom-build for” quest: Dungeons Deep and Caverns Dim.

Coming as the third quest in the first Saga Box, this quest see players following the parallel stories of Thorin and his dwarves as they battle Goblins and try to make it out of the caves alive, whilst Bilbo and Gollum play their game of riddles.

The Challenge

First up, I want to say that this is a really difficult quest. The main staging area sees players faced with a location that is immune to player card effects, cannot leave the staging area, and contributes X threat, where X is double  the number of players in the game. In what is already a fairly surge-heavy encounter deck, players also reveal 2 cards each, making for a minimum of 8 cards coming off the deck each round in a 4-player game.

Lake-in-the-Cavern

Whilst this stage is hard, mechanically it’s pretty standard. Reveal lots of cards, kill the enemies, make progress. The big twist in this quest comes from the other quest card, representing Bilbo, Gollum and the Riddles.

Many of the cards in this encounter set have riddle effects. A riddle requires a player to shuffle their deck, then name various characteristics, as demanded by the riddle – sphere, type and cost, etc. finally, they discard a given number of cards from their deck, hoping to find a match – for each match, they can place a progress token on the quest stage.

GollumThis is the only way to place progress at this stage, and in all our recent games, it has taken us significantly longer than the regular quest. If you fail to get a match, Gollum will attack Bilbo, so three failed riddles means dead Bilbo, and the players lose the game. Gollum and Bilbo are the only cards at this quest stage, and become immune to player-card effects, so there’s no way to kill Gollum, bolster Bilbo’s defence, heal him, or even re-ready him to defend an extra attack.

All of the above should make it clear that failing to answer a riddle is not something you want to do. However, for a normal deck, failure is the exception rather than the norm. To take the most extreme example, how confidently do you think you could predict the type, sphere and cost of the top card of your deck, without looking? I tried this quest recently with a set of decent decks- a 2-ish sphere dwarf swarm, a mostly mono-Lore Elrond deck, and a mostly Leadership Aragorn questing machine: we cleared the normal stage easily, but Bilbo was dead by round 3.

Custom-Building

We tackled it again with custom decks. The dwarves were out, the leadership and Lore decks were now properly mono (aside from Gandalf), no tactics Ents, Vilya, Elrond’s Counsel, no more Arwen. I built an entirely brand-new tactics deck in which no card (except Gandalf) cost more than 2, and it was mostly allies.

With a lot of damage and copious use of cards like Mighty Prowess to take out the goblin-swarm, we made it through – it was still a relatively close call, as we were losing our decks rapidly, and taking damage left, right and centre. We did at least manage to avoid losing more than one riddle. We were still very vulnerable though, particularly to the treachery that makes each player add a goblin to the staging area, and for our four-player assault on this quest, I added a mono-spirit deck, focused around cancelling hideous effects like this, and recycling cards with dwarven tomb and will of the west. If anything, this quest gets slightly easier with four, just because you already know that all the goblins are coming out, and you can cover all the bases, whilst remaining mono-sphere.

Difficulty

Thinking about the difficulty of this quest overall, I think it’s difficult at the best of times, and impossible when not. A “one deck to rule them all” is likely to see Bilbo get riddled full of holes, and regardless of how many players you have, I think it’s all going to be down to blind luck.

When you start to custom-build, the quest becomes possible, but it’s still a challenge. Crucially though, I think you start to see more nuance across player-numbers. Solo is harder because you’ll struggle to cover the bases mono-sphere, and are more susceptible to being overwhelmed with an untimely surge or two. Two or three player you start to be able to get on top of things, but the sheer number of cards you’ll be revealing (surge is almost guaranteed, as is the goblin-fetcher) make it hard to plan. Weirdly, at four it’s almost easier: the uncertainty has gone, as provided you’re prepared to throw half your deck on riddles, you can probably survive. That said, the fact that the Island in the Lake is now 8 threat, and at least one of your decks probably sucks at questing doesn’t help.

Ratings:

General Deck – Solo: 10, 2-player: 10, 3-player: 10, 4-player: 10

Custom-Build – Solo: 8, 2-player: 6, 3-player: 7, 4-player: 6

When the Going Gets Tough

Or “101 ways to stop you from killing an enemy”

In the beginning there were enemies. They had defence, and they had hit-points: as far as killing them went, that was basically all you needed to know.

DSC00753In the days of the Core Set, there was only a limited amount of attack available. No character had more than 3 printed attack, and the attachments that could boost your attack were limited in number, had the Restricted keyword, and weren’t all that effective unless you were a dwarf. The only really exception was Gimli who, if you loaded him up with enough citadel plate, could be hitting for about 14 (although prone to die at any moment).

It’s bizarre now to think that no core-set enemy was immune to player-card effects. The Nazgul of Dol Guldur has “No attachments” but even that was an errata. He was also the largest enemy, needing 12 attack to one-shot.

SturrockWith time, the card-pool grew, it got easier to muster large parties of allies, and easier to boost the attack of the characters you had. The designers decided that enemies needed to be tougher. They tried a few ways of doing this: more trolls in Conflict at the Carrock, with the ability to boost each other’s stats – 10 hit points, 2 defence, and a potential for 2 more if you are engaged with Stuart and the Carrock is active. The dead marshes brought us the Giant Marsh Worm, only 2 defence, 6 hit-points, but if you don’t kill it first time, it’ll heal 2 damage. For Return to Mirkwood, they stuck with the standard formula, and just made the Attercop big, 4 defence, 6 hit-points.

Khazad-Dum and the Dwarrowdelf cycle focused most on smaller swarms (apart from the odd troll), so there wasn’t much development of enemy resilience, aside from The Watcher in the Water, and Durin’s Bane, which saw the “do some healing each round” mechanic formalised in the “Regenerate” keyword.

Come down here where I can fight you

One mechanic which did start to be developed in the Dwarrowdelf cycle, was the idea of enemies you can’t simply engage as and when you want. The Goblin Sniper from the core set was the original version of this, but down in the darks of Moria, we saw this become more and more the case, with Goblin Archer, and most irritatingly for me, the Goblin Scout, a pesky little blighter with 3 threat (that was quite a lot for an enemy in those days), who couldn’t be engaged if your threat was between 26 and 36 (which was where my threat seemed to be most of the time, at least in the early rounds).

Khazad-Dum was also where these engagement prohibitions started to spread to locations, such as Turbulent Waters, and the lock-out that was the East-Gate, frequently the cause of complete stage one failure on Into the Pit. As with all these mechanics, it was an interesting twist for them to try, but an irritating thing to play against.

Immune to Fun?

What's the collective noun for a group of Smaugs? a Desolation?

What’s the collective noun for a group of Smaugs? a Desolation?

Starting towards the end of the Dwarrowdelf cycle, there have been a growing number of enemies in the game with the text “immune to player card effects” By my latest count, this includes 5 versions of Smaug, 2 of the Balrog, The Witch King (Black Riders only), The Watcher in the Water (Road Darkens only), Saruman, Old Man Willow, and Bolg. Aside from Bolg and Old Man Willow, these are all clearly top-tier enemies, who deserve a level of protection above and beyond your everyday orc. That said, “Immune to Player Card Effects” is boring. It means that your only option is massed numbers, it means that all of the thought goes out of deck-tweaking, and you just need a Middle Earth version of Hulk Smash.

There are, of course various options available. I’m a big fan of the “Relentless” keyword which Ian created for the First Age expansion – this allows players to do things with their deck, interact with the encounter cards in interesting ways, but it also means that if the enemy isn’t dead, it will attack you each round.

It was inevitable that with time, the designers would need to come up with ways to make things harder to kill, and obviously we want them to keep it interesting and innovative, but as far as I’m concerned, Immune to Player card effects and Indestructible should be used sparingly. Anything which reduces interaction between player cards and encounter cards eventually reduces the interest of the game.

[/rant]

Mûmak Ways to make enemies harder to kill returned with a vengeance in Heirs of Numenor. At the most basic level, this included a fair amount of just making them big. Even the standard little orcs and brigands regularly had 3 defence, with 3 hit-points being at the low end of things. We also got the Mumak, a big enough beast to begin with, at 3 defence, and a mighty 12 hit-points, the Mumak cannot have attachments, and had a new text “Mumak cannot take more than 3 damage each round.” Unless you can find a way to discard it, that’s a minimum of 4 rounds the Mumak is sticking around for, either contributing 4 threat in the staging area, or hitting you for a bruising seven attack. (The Nightmare version, Mumak elite, ups the defence to 5 and adds archery!!)

Nazgûl-of-Minas-MorgulThe rest of the Against the Shadow cycle featured plenty more large enemies, all dwarfing the things we’d seen in Mirkwood, but it wasn’t until the Morgul Vale that we saw a new anti-damage mechanic, this time on the Nazgul of Minas Morgul. Any time you would deal damage to the Nazgul of Minas Morgul, that damage is reduced to 1, meaning you need to damage it on 5 separate occasions to kill it.

I think this is one of my favourite options in terms of the routes the designers could have taken. This gives you options: Gondorian Spearman, Spear of the Citadel, Dwarrowdelf Axe, any of these are possibilities for speeding up the 5-round process of killing the Nazgul, meaning that players actually have interesting decisions to make. The Nazgul is a still a pain (between the shadows which returned him to the staging area, and the bodyguards, I think it took me 9 rounds to kill him last time I played this quest), but the game remains interesting and interactive.

Running Away

It’s worth noting, of course that another major weapon in the designers arsenal is an enemy that simply doesn’t hang around long enough for you to kill it. The Wargs of the Core Set were the original example of this, where an attack with no shadow led him to run away, back to the staging area, where you couldn’t attack him, and he could continue contributing his threat. Since then, there have been many variations on this theme. Enemies which return to the staging area after they destroy a character are a popular way to punish chump-blocking, (Uruk-Hai fighter, Angmar Marauder) but there are also cards which make you pay threat to stay engaged with an enemy (such as the original iteration of the Witch King), or shadow cards that make every enemy a sudden flight risk – such as Lurking in Shadows.

Ultimately, these enemies, unless they are the big boss, tend not to be too bad once you can actually get them to stand still long enough for an attack, but the number of times I’ve seen Journey Down the Anduin drag on for another round or two, just because I can’t keep a Warg engaged with me long enough to kill it…

Moving forward to Voice of Isengard, there was little real change in the approach to enemies. The Dunlendings are big (much too big for theme, if you ask me), the Huorns are massive, as befitting something that’s basically a tree. The Ringmaker cycle continued to give us lots of big enemies, and even bigger boss-fights, but at least on the how-to-kill-this-thing front, there were no major developments.

Toughness

Uruk-hai-Captain The biggest change in recent times has come in the Saga boxes, where we’re seen the rise of “Toughness” on the Uruk-Hai. Toughness X is a new keyword which means that EVERY time an enemy is dealt damage, you reduce that damage by X – in combat, this simply operates like an extra point of defence, but crucially it also locks out direct damage effects. Thalin, Spearman, Spear, Dwarrowdelf Axe – none of them do anything to an enemy with Toughness. If you’re dealing with Ugluk, the boss enemy from the first quest in Treason of Saruman, then even Gandalf’s “enters play” ability will only do a single point of damage!

Toughness is an interesting change- on the one hand, it does shut down a LOT of options, as there are a remarkable number of ways to deal 1 point of damage to enemies, but at least it still leaves room for players to experiment. Part of me thinks that the developers have backed themselves into a corner slightly, by making the Dunlendings so improbably powerful that to have the Uruk-Hai seem appropriate in relation, needs them to be “tough” in this way. That said, there are a lot of ways this could have been handled worse, and whilst the Treason of Saruman is certainly at a fairly high difficulty level, I don’t think that it has gone too far to still be fun

How Many Of?

When building decks for the Lord of the Rings living card-game, a major question you need to consider, is how many copies of each card to include.

A legal deck for this game needs a minimum of 50 cards. As far as I’m aware there’s no upper limit, which is good if you are as undisciplined in deck-building as I am, and regularly get card-counts into the high 60s. By default, you can have 1-3 copies of a card by a particular title in your deck, although there are some cards which have tighter restrictions.

At the one extreme, that means you could build a legal deck with only 17 different cards if you ran three of each (or two of one of them). On the other hand, you could run 50 or 60 different cards if you wanted single copies only – when I used to play the Game of Thrones LCG, I occasionally encountered people playing this “Highlander” version of the game.

1 of Each

Black-ArrowSo far, there are 4 cards which have a “limit 1 per deck” although this looks set to grow in the Angmar Awakened with the rise of player side-quests. The current cards are Black Arrow, Path of Need, Fall of Gil-Galad, and Gather Information.

Black Arrow is a very powerful card. It costs zero and isn’t restricted. As far as I can tell, if you have a Tactics Hero, and there’s going to be a Ranged Hero in play, there’s no reason why you wouldn’t play this. It enables your hero to knock out that one big bad, and even has victory points.

Path-of-NeedPath of Need is a little more situational – it’s undoubtedly a powerful effect: heroes don’t need to exhaust to quest, attack, or defend whilst it’s attached to the active location, but the limit 1 per-deck makes it hard to draw consistently, and when you do, it still costs 4 resources to play. Add to that the fact that you’ll probably blaze through in a single round, and it becomes marginal as to whether the pay-off justifies the cost.

Of course, you can do a certain amount of shenanigans to get repeat use: particularly with cards that swap out the active location (Strider’s Path, West Road Traveller), although the most obvious one – Thror’s Map was errata-ed (for those that care about that sort of thing) to stop you from generating an infinite loop. These days, you can probably get exhaustion-free combat round after round, but not questing.

The-Fall-of-Gil-GaladThe third 1 per-deck card, was the Fall of Gil-Galad. This is a spirit attachment, a song which lets you lower your threat when a hero dies. Now, obviously, threat-reduction is always good, and a sizeable chunk of threat reduction (whatever that hero’s treat-cost was) is particularly handy at the moment of crisis where a Hero has just died – it might give you the breathing-space you need to avoid engaging enemies for a round or so, or to allow you to fail the quest whilst you repel boarders without threating-out.

That said, the card still doesn’t feel that much fun. Unless you have Fortune or Fate, you’re still down a hero. Unless you’re REALLY near the end, you’re probably quite likely to die (as you wouldn’t have lost that hero if you were otherwise in complete control). The fact that it’s an attachment, not an event, means that you have to plan for the hero to die, but the card is explicit that they need to be destroyed, you can’t combo this with Boromir’s discard ability, or Caldara’s or the Great Bridge of Khazad-Dum – although you can use Landroval instead of Fortune or Fate. Ultimately, there are probably better ways of lowering your threat which don’t involve dicing with death so much. If you’re going into the quest planning to have a hero killed, chances are you’re doing something wrong.

Gather-Information
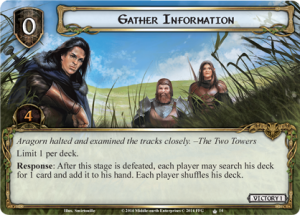
The fourth, and most recent 1 per-deck card was “Gather Information” the first of a new card-type, the Player Side-Quest. When you draw this card, you can add it to the staging area as an additional quest card, meaning that on a chosen round you can place progress on that quest instead of the main quest, and when you have fully explored the stage, you can trigger the relevant response – essentially, it slows you down by a round or so, but gives you a reward- in this case, each player being able to search their deck for a card and add it to your hand.

Obviously, there are some quests, where this is going to be a terrible card to play (go on, I dare you to use it in Battle of Five Armies) and you’ll certainly need to think twice about wheeling it out in quests with punishing time-effects, but used right, this feels really powerful –the ability to fetch a missing combo piece, or even the card that’s most frustratingly absent right now. This card has only been out a few weeks, but it’s already seen a fair bit of action. I’ll be interested to see whether I’m still using it in 6 months’ time. (This may depend on how good the other side-quests we get are).

How many?

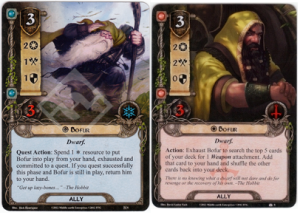
Aside from the exceptions above, for every other card, you’re able to choose how many you run, between one and three. It’s determined by card name, so where there are multiple versions of a character, the limit spans all of them (so you can run Spirit Bofur AND Tactics Bofur in the same deck, but a maximum of three copies between them).

Bofurs

Reasons to be Three-ful

Running 3 of a card gives you a better chance of drawing it than if you only have 1 or 2. If you take your opening hand of 6 cards, there’s a 6 in 50 chance of drawing any given card. If there’s only 1 card there, that’s about a 0.12 chance (roughly ten per cent). With three copies, it goes up to about a third. If you mulligan, there’s now about a 60% chance of having that key card by turn-1 set-up

So, “3 of” looks like a good strategy for making sure you get that key card early on. If your Spirit Glorfindel secrecy deck needs Light of Valinor, just run 3 of, desperate for Asfaloth to go on top and deal with those pesky locations? –  3 of.

Simple, right?

This Hand Ain’t Big Enough For the Both of Us

Well, not quite. There are some cards where having three copies is great. If I have 3 copies of test of will in my hand, I can cancel that definitely-annoying-but-possibly-not-fatal treachery when it comes off the encounter deck. If I have three wardens of healing, then I can heal three times as much damage. In some of the newer quests, particularly archery-heavy ones, that’s a definite boon.

Sword-that-was-Broken
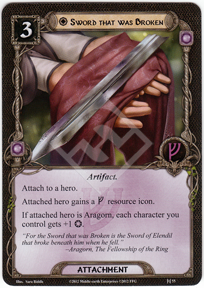
The trouble is, most decks rely on more than one or two cards. However much your Aragorn hyper-quest deck needs Sword that Was Broken, Visionary Leadership and Faramir out, it’s not going to do a lot if you can’t find those cheap allies to flood the table with. You might think you have a brilliant starting hand when you draw the three key cards in set-up, but if from turns 1-9, all you draw are duplicates of those unique cards, you’re going to be pretty sick. Obviously, that’s an extreme example, but you get the idea: the first copy of a unique card is great, the second or third, with a few exceptions are a pain.

Making use of it

There are cards in the game which at least allow you to do something useful with those unwanted duplicates of unique cards. The first of these is everyone’s favourite Shieldmaiden, Eowyn: with her 4 willpower, Eowyn has always been a questing powerhouse, and you have the option to boost that total even higher by discarding cards. In our games, the biggest difficulty is finding a card that someone’s prepared to ditch, but when it’s a dead-card because it’s already in play, that suddenly becomes a better proposition. Add to that the fact that Eowyn can now borrow her uncle’s sword to put that mighty will into attacking as well, and that dead card suddenly doesn’t look so bad.

Whilst it relies on finding and drawing the card, Eowyn’s ability is writ large in Protector of Lorien. This lore attachment, again dating from the days of the core set, allows you to ditch multiple cards to boost willpower or defence. These days, it’s technically limit 3 per phase, although my copies are old enough to let you ditch your whole hand if you like. Being in Lore, Protector is best paired with some powerful card-draw effects which, of course, just make it more likely that you’ll have those duplicates cropping up.

There are some other, slightly less common options for cycling through those duplicate cards:

Erestor Erestor. He’s a unique Noldor ally in Leadership who allows you to discard a card from your hand to draw a card. Erestor’s ability is nice, in that it doesn’t require him to exhaust, so he can be questing for 2 per round whilst you’re triggering his ability, or he can defend in an emergency (only 1 defence, but 3 hit-points)

(Hero Erestor was spoiled between when I wrote this article and when I uploaded it. Whilst his function is similar, I’m not going to discuss him here, as I’ve not really had chance to figure him our properly).

Daeron’s Runes functions along similar lines: draw 2 cards, then discard 1 (1 from your hand, doesn’t have to be one of the two you just picked up).

Trollshaw-ScoutWatcher of the Bruinen and the Trollshaw Scout are relatively cheap non-unique allies in Tactics, who do a moderate amount of attacking or defending, with the drawback that, after an attack resolves, you have to discard a card or discard the ally from play.

Overall then, there are plenty of ways to make lemonade from the duplicate lemons that get stuck in your hand (although only Eowyn’s ability is hero-based and therefore guaranteed to start in play), but this only goes some way to overcome the irritation of drawing a duplicate of a unique card already in play – sure, you can turn it in to +1 Willpower, but you could have done that with a non-unique ally, AND you would have had the option to play that ally as another quester/fighter etc.

There can be only one

So, at the other end of the spectrum, why not run a Highlander deck: single copies of every card?

Well, for one thing, such a deck is wildly inconsistent. Sometimes it might give you exactly what you need, but at other times, it’s going to throw out something completely different. Most decks will have some kind of theme, whether that’s as blatant and explicit as the Outlands Deck (get lots of outlands allies, play them) or the dwarf-swarm (get 5 or more dwarves in play) or something more subtle – if you’re only playing single copies of each card, chances are you’ll struggle to find enough different cards which all fit that theme. There are only a limited number of allies with the required traits or spheres, only a limited number of events which will produce the type of effect you’re aiming for.

Northern-TrackerAlso, it’s worth noting that with NON-unique cards, the argument against playing 3 is a lot less convincing. A lot of the time, having multiple copies of the same non-unique ally is good, as they do the same thing, but more of it. That said, you do still need to pay for them: 3 Northern Trackers in a deck with only 1 Spirit Hero isn’t necessarily a terrible idea (it is still a REALLY good ally for a lot of quests) but you need to bear in mind that without resource acceleration, it’d take you 12 rounds just to play those three cards.

Meet Halfway

Between the extremes of 1 and 3, obviously, comes 2. If you’re keen enough to see a card that you want more than copy of it floating around, but you don’t want three (maybe it’s unique, maybe it’s just situational, or quite expensive) then 2 seems like the happy medium.

Interestingly, although I’ve not done any statistical analysis, I strongly suspect that “2 of” is the distribution I use least of. If I’m running a card, I generally want 3. After a while, if I find I’m not really using it, chances are I’ll purge it all the way down to 1.

I’ll freely admit, I’m not one of the best deck-builders this game has seen. Large parts of my decks build themselves (leadership = 3x Sneak Attack, 3x Gandalf, 3x Steward of Gondor. Spirit = 3x Test of Will, probably 3x Unexpected Courage. Any deck with Glorfindel in: 3x Light of Valinor, 3x Asfaloth, 3x Elrond’s counsel etc) and perhaps this is a good moment to re-assess how many copies of a given card truly belong in a deck. Assuming you have a decent chunk of the published card-pool, we are well past the point where we need to throw in three copies of everything, just because there aren’t enough cards to make up the numbers.

I’d be interested to know how others approach the question of how many copies of a given card to include in a deck.
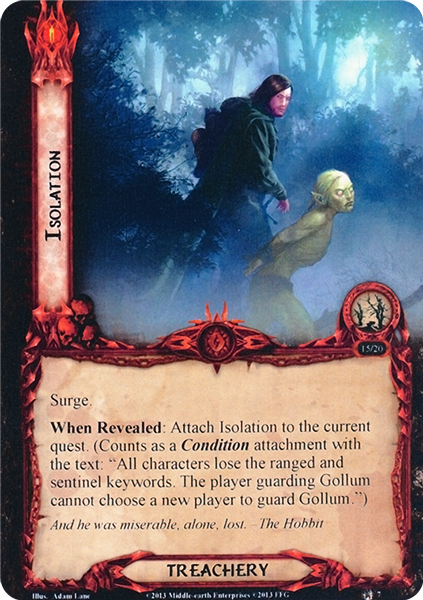
Taking the Difficulty project to Isengard

(…gard, gard, gard)

To Isengard Last week, I finally got the pages up for the difficulty project, to actually display the ratings on. A combination of my own lack of computing skills, and the sheer awkwardness of the WordPress software that kept turning pages into posts had defeated me for rather longer than seems probable.

Stepping back, it’s clear that there’s still a very long way to go. There are many, many gaps in the ratings. I’d always hoped that I’d get some community feedback, rather than trying to rate every quest by myself, but even so, it’s clear that I need to up the frequency with which I post updates here.

This weekend, I’ve once again had the house to myself, so I decided to go and throw dwarves at the Voice of Isengard.

I have a dwarf deck that I’ve been running for a while, with remarkably little change. Dain and Thorin are the linchpins, with a Lore hero of some kind making up the numbers. Traditionally Ori for his card draw, but occasionally Bombur (first subbed in after Ori sacrificed himself to deal with a Balrog) and most recently Bifur. It works nicely for true solo, but also pairs with a Spirit/Tactics deck in 2-player.

It’s a fairly strong all-round deck, which relies on getting lots of allies out, then overwhelming the quest. All the allies are dwarves aside from Gandalf and the Warden of Healing. I tend to rely on Lore for my Card-draw, with Leadership focusing more on resource acceleration, action advantage and the like. The only cards I’ve added to this in months are Ally Gimli and Gather Information

The Fords of Isen

The Fords of Isen was the first quest I faced. Almost instantly, it demolished my “one deck to rule them all” premise, as masses of card-draw was clearly going to get me nowhere. In the end, I temporarily subbed out 5 cards – 3x Daeron’s runes, and 2x Legacy of Durin. The deck is sufficiently oversized that it’s still legal with those cards removed.

Whilst this is a deck I’ve used all over the place, it does quite well against quests with “time” – turn one is often quiet, but ideally you’ve got Fili in your opening hand, so turn 2 you have your five dwarves and you’re good to go. I also run 3x Gandalf and 3x Sneak Attack, which meant that on this occasion, I was able to avoid combat altogether for the first few rounds, just dropping Gandalf on Dunlendings instead.

Ill-TidingsI think it’s inevitable with this quest that if you beat it, it’s going to be fairly quick. The longer you go on, the more likely you are to find your hand clogged with Ill Tidings and suffer the various side-effects of things targeting your hand-size.

This quest can mess with your head- it was the first time we were punished for hand-size, but actually, there are multiple common cards which will take advantage of ditching cards (Eowyn, Protector of Lorien) or you can just have lots of resource acceleration, and run out of cards naturally.

Whilst this was a very easy win for me, that was down to an almost-perfect starting-hand, and I think the real difficulty is around the mid-range.

5/10

To Catch An Orc

Methedras-Orc The second quest from Voice of Isengard caused me some problems. There are some big enemies in this – Mugash himself is very large, and the Methedras Orc, who seemed to have an incredible knack of arriving in the same round swings for a 5 that was causing me issues, as I didn’t have enough bodies to chump, but couldn’t take an attack that big undefended, even with healing on hand.

On the other hand, if you get a manageable start, and Mugash is low in your out-of-play deck, this one can run long. I ended up with an enormous army of dwarves, and finally found Mugash on turn 13 – it took that long to get more than a couple of locations with “searches” – in a multi-player game, I don’t think this would happen nearly so easily.

On this instance, I was able to take out Mugash in 1 fell-swoop with a sneak-attack Erebor Battlemaster (these are the only out-of-sphere cards in the deck, relying on Narvi’s Belt, or Very Good Tale to make more permanent appearances), then storm through stage 3 in one round.

Despite all that, I think this one is harder than “Fords.” There are more ways for time counters to disappear, and the enemies can quickly get big and nasty. If there was a player solely focused on combat, it might be a different matter, but in solo, I’m going to go fairly high.

7/10

Into Fangorn

In a moment of utter foolishness (or at least a dismal lack of concentration) I once took a Ranger Trap deck up against Into Fangorn. The dwarves were sufficiently generic that they were not quite so stupid a proposition, but the quest still has challenges.

Deadly-HuornFor one thing, this feels like the easiest quest to get smashed by time. In “Fords” there aren’t too many ways to lose time counters, and To Catch has a built-in mechanic to replenish them. Here though, you either need to smash through everything in a round or two, or the objective has gone and you’re lost in the woods on an entirely different quest stage.

It’s also worth noting that the enemies are BIG. The hinder keyword means they don’t necessarily hit you that hard (although there are some treacheries that can see to that) but you need 9, 10 or 12 to one-shot a Huorn, significantly more if you’re doing it over several rounds.

Aside from the general Voice of Isengard hate on Turtle Decks, this also has cards like Low on Provisions which punish swarm decks. Fortunately, dwarves are quite sturdy (even more so if you can get hardy leadership on them) so I was able to survive this and heal back up.

Given just how lost you can get in Fangorn, and just how hard a Huorn will smash if it does decide to attack, I think this is the hardest of the bunch, although it’s close with To Catch an Orc.

8/10

Now- anyone really observant will notice that the ratings I’ve given above are not the same as the ratings appearing on the page. That’s because these three had already been rated by a reader (and one who clearly found them less of a challenge than I did. Whenever I’ve got multiple ratings for a quest, I’ll be using a straightforward mean average. I may well also introduce a colour-scheme (if I can figure out how to do coloured text on here) to show how many ratings a quest has.

Going Solo

I, and I’m sure many others, regularly enthuse about this game, for the fact that it’s cooperative. Aside from the fact that it fits so well into the theme of Tolkien’s world, many of us like getting to work together with other players to combat a challenge thrown at us by the game, rather than being locked in a battle against each other.

However, whilst it might not always get as much attention, this game is marketed as a Solo game. This is a major reason for many players to get into the game, as they don’t need to find a playgroup, but the solo iteration of this game is not without its critics. (I’m not going to dwell on “two-handed solo” which is, for all intents and purposes, the same as a 2-player game, except that you know exactly what cards the other player has in hand)

It's more of a Great "us" Bow now...

It’s more of a Great “us” Bow now…

First of all, there will always be cards which are of less use (if any) to solo players.

Ranged and Sentinel were criticised early on as being meaningless for the single-player environment, although there are now cards which can provide you benefits from these characteristics, outside of the multiplayer environment: Great Yew Bow, Rivendell Bow, or Rumil can up the value of your ranged character.

Trask-Industries-Front-FaceThere are also encounter cards which have similar requirements. Various iterations of birds or bats have been an obstacle for anyone not carrying ranged, making it a must, at least for consideration when building a true-solo deck.

Sentinel is a bit trickier – although The Day’s Rising can make money out of a Sentinel, regardless of who the enemy is engaged with.

Sometimes You Can’t Make it On Your Own

(I feel like that may be a U2 lyric? – not sure, that’s around the time I gave up listening to them)

Recently I spotted a post on Board Game Geek from a frustrated player who had coming crashing to a halt against Escape From Dol Guldur with a single core set. As most players who have played this game will know, that can be a brutal experience, with any number of players, worse so when you’re trying to deal with it by yourself.

One does not simply stop at a single Core Set

One does not simply stop at a single Core Set

I guess that the problem here is actually two issues running into each other – the difficulty of playing certain scenarios solo, and the difficulty of playing this game with a single core set. I came to this game having played the Game of Thrones LCG for a year or two, so I had no illusions that my core set would be the complete play experience – I always intended to buy adventure packs, and knew that I would reluctantly get additional core sets at some point (I currently own 2).

There are points in this game where the quests have made me despair – quests which seemed so implausible solo that I didn’t even bother trying. That said, I don’t feel that it necessarily stays that way: with my wife away on holiday for a week, I’ve been catching up on some of the scenarios I’d never completed solo. A Tactics Aragorn / Halbarad / Mablung deck overcame Siege of Cair Andros (at about the tenth attempt), then a Tri-sphere Elf-Deck of Celeborn, Haldir and Glorfindel (Yes, Him. Sorry…) blasted through Encounter at Amon Din and Assault on Osgiliath. The final solo challenge of the Against the Shadow cycle was The Morgul Vale, which I eventually managed in a 17-round epic (stupid shadows returning that Nazgul to the staging area).

“can only be attacked by one character at a time?" – that’s fine with me

“can only be attacked by one character at a time?” – that’s fine with me

Of course, there are scenarios which present a massive challenge solo – We Must Away, Ere Break of Day defeated both the Elves and the Dunedain, as both were repeatedly crushed by the trolls, even with ideal starting hands.

I finally cracked this one with the reliable old “chuck many dwarves at it” strategy, turtling for a few rounds whilst the dwarf-swarm built up, finally getting a bit of luck with the sacks, then smashing them with an Erebor Battle-Master or two.

There are still scenarios which I haven’t managed solo – Voice of Isengard messes with my head at the best of times, and I’m dreading The Three Trials and The Dunland Trap. Journey in the Dark feels like it would inevitably end in death, and Breaking of the Fellowship just doesn’t make a lot of sense solo.
The World of the Lone Traveller

The-Master's-Malice Aside from difficulty, I think the game is just plain different in solo as opposed to multi-player. For one thing, I think that the degree of randomness goes up a lot in solo – several of the scenarios I’ve dealt with above contain “The Master’s Malice” the treachery card designed to bring death to anybody not running a mono-sphere deck. In solo, you have to assume that you’re going see that card at least once and be prepared to deal with it: either build mono-sphere, have chunky characters and healing/damage cancellation, or treachery cancellation.

In solo I ran a tri-sphere deck. I did have 3 copies of a test of will in the deck, but to be honest, my main strategy was “hope this card doesn’t appear” (or appears as a shadow) – it worked on 2 of the 3 scenarios, and with the third I just started again.

Was that it?
Other scenarios can run strangely short – if we had started Assault on Osgiliath with 4 locations in the staging area and no means of exploring them without travelling, we would have needed 5 rounds minimum – assuming the unlikely occurrence of no other location showing up. By contrast, I was able to beat it solo on round 3:

  • Turn 1, travel to first location and kill enemy revealed in set-up
  • Turn 2, clear first location, travel to second location (revealed in round 1 staging) and kill enemy revealed in round two.
  • Turn 3, deal with treachery revealed from encounter deck, explore second location, win.

I think that this scenario is easier, as well as shorter, in solo play. I’d previously been scared away from this scenario after trying it out 4-player and drawing Southron Support turn 1 (ended up with 6 locations, and 9 enemies in the staging area after the first round’s staging- together with doomed 3, we lost by enough to make us engage ALL the enemies.)

Bucklebury-Ferry Generally, the “have no X in the staging area” scenarios are easier with fewer players

– Shadow of the Past 4-player made me feel like it was never going to end, as we had more than enough out to quest through all the threat and defeat the Nazgul, but we couldn’t ever get the staging area down to a single location in order to travel to Bucklebury Ferry (yes, we should probably have brought more location management, but this was a pick-up game at a shop, including 1 player who only owned a core set plus Celebrimbor’s secret).

Overall, I do think this game is worth playing solo – and it’s been a refreshing change this week to revisit some of the solo decks and approach scenarios from a different angle. I think it is, generally, harder than multi-player: It’s harder to just roll up to a random scenario with a random deck, and you certainly have to accept the LCG model for what it is (i.e. an assumption that you will buy more packs than just a core set), but with those caveats, it’s not only possible to play, but more importantly, it’s still capable of being fun. I still think that two or three-player will continue to be the way in which I play the game the most, partly because it feels better balanced, but also because that suits the people I typically have around for gaming. I’d be interested to know what other people’s thoughts and experiences of solo play are.

Difficulty in the Dark

A while back, I published the first in a series of scenario reviews and ratings for the difficulty project: working through the quests from Black Riders, using only the cards from the first two Lord of the Rings Saga boxes and the Core Set.

ValiantRecently, I finished this play-through, taking the same two decks along the darkening road through Moria, to the Breaking of the Fellowship.

It’s worth noting that we were playing in Campaign Mode. This meant two things this late in the game- firstly, it meant that Gandalf and Aragorn had permanent bonuses to their attack and defence respectively, but also that the encounter deck was growing ever more heavily stacked with burden cards, typically surging treacheries that not only do something nasty, but also replace themselves. Overall, I think the good and the bad balance each other out fairly well, but it’s worth making people aware before I write the actual quest run-downs.

The Ring Goes South

The first of the quests in the second box, this one kicks off with a fun re-creation of the Council of Elrond, where the players have to decide between a series of cards, putting one into play for free, one in hand, one in the discard pile, and shuffling one back into its owner’s deck.

Howling-WargThe main theme of this quest, is damage to the active location, with various nasty effects which strike the players when the quest stages leave play. Combined with a compulsory requirement to travel when able, and a series of nasty Wargs, this one keeps play moving at a fairly hefty pace.

Healing is pretty much a must-have (at one point, I was forced to sneak-attack a daughter of Nimrodel, heal with her, ready with ever vigilant, then go again) especially if you have Hobbits with their small pool of hit-points, but you also need  combat to deal with those Wargs, strong questing to move through the stages quickly, and ideally a bit of staging-area location management.

Whilst this one certainly challenges players, it does so in a fairly rounded way, making me feel like I could deal with this using decent “standard” decks (I appreciate that my view of healing as a “standard” requirement for a set of decks is not universally shared).

Difficulty wise, this certainly wasn’t as punishing as knife in the dark, and felt a bit calmer than the other box 1 quests. The punishing amount of damage though, makes it tricky to handle.

Difficulty rating: 2-player, limited card pool – 6/10

Journey in the Dark

Journey in the Dark takes the players once again into Moria. Evidently, this is becoming well-worn territory by now – I discussed last time out, that this is the third version of the Balrog we’ve seen in one shape or another, so they needed to do some work to keep it fresh.

First up, this quest presents some challenges. There’s a lot of archery damage to be reckoned with (although not on a Druadan Forest scale), and you’re actively punished for making optional engagements, which means that the archery damage is going to keep piling up.

Whilst there’s definite potential in doing a bit of custom building, to have a super-Dunhere, Legolas with Rivendell Blade and Great Yew Bow, or even just some Sneak-Attack Descendant of Thorondor work, the easiest way is to just quest hard and strong straight through.

We encountered the Balrog on stage 3, but couldn’t muster anything like the attack needed to finish him off (especially now we know that he’s still immune to player card effects, and staggered out of Moria, all heroes still alive, but no Balrog in the Victory display, leaving a large number of Burdens to be added to the Campaign Pool.

Definitely the hardest of the 3, we got wiped out once by the orc-swarm, and if you have the misfortune to encounter the Balrog before stage 3, it’s probably curtains.

Difficulty rating: 2-player, limited card pool – 8/10

Breaking of the Fellowship

On the surface, appears one of the most challenging quests. In reality, I think it’s a lot more doable, it just takes a bit of planning.

In quest stage A, all enemies have a defence boost of 2, many have toughness (damage reduction) and they cannot be engaged. Sniping the staging area as in Moria isn’t going to work here.

You also have a pair of locations – Sarn Gebir and the Argonath which need to be dealt with before you can clear the stage. The Argonath don’t really do anything, but Sarn Gebir will damage you when it’s cleared. Both (obviously) are immune to player card effects.

Sarn-Gebir The-Argonath

We failed at this a few times, before deciding to just chuck everything at it. Quest hard- don’t worry about leaving characters ready, as you’re probably not going to have to fight anything. You’ll take damage when you advance, but it can’t be helped.

The transition is difficult – you’ll need some kind of action advantage (we used the boon Lembas bread) to stave of the initial wave of attacks.

After that, it gets a lot easier. The fact that you can choose which quest stage you tackle, allows you to play to your strengths, particularly with 2 players. I was able to quest away my enemies, without needing to bother worrying about having to fight them. The other player was able to re-ready heroes every time they quested successfully, allowing us to fight as necessary.

The way of digging through the deck for Frodo’s choice, and then covering his escape was nicely done- I found Frodo and was able to push through fairly easily. Although it’s a puzzler, with a few odd tricks to start with, this one’s actually not that hard once you get it sussed, and once you make it to stage 2.

Difficulty rating: 2-player, limited card pool – 6/10

I realise that these reviews are making the difficulty project take a lot longer than initially anticipated, but I still think it’s a worthwhile exercise – thanks to all those have already contributed ratings, I’ll be trying to get them compiled shortly